Write what you are looking for and press enter to begin your search!

Live News


Monster Hunter Rise Switch Skills Guide: The Best Swaps For Your Regular Attacks
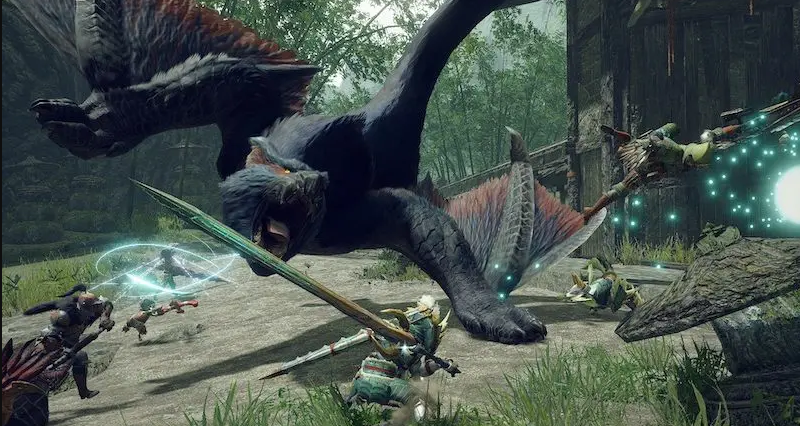
Ever feel like your regular attacks could use more oomph in Monster Hunter Rise? Not a fan of the regular Greatsword default attack and want a better alternative that’s more fitting to your playstyle? Then Monster Hunter Rise’s new Switch Skill mechanic is for you.
Basically, you will unlock the ability to switch out certain regular attacks and Silkbind Attacks at will while you’re on your monster hunting journey. This allows for more flexibility when you’re fighting and when you’re teamed up with a group so you can contribute better. Most importantly, this mechanic gives you more choices for weapons you already enjoy using. It also lets you try out other alternate weapons via new skills and basic moves that may fit your play style.
Just some caveats though:

Adamant Charged Slash: Switchable with Hunting Edge. This skill uses a Wirebug to dash forward, and deliver a Strong Charged Slash. This move has knockback protection as you dash forth.
This is a very good replacement if you do not like using Hunting Edge, a staple in the MonHun series. Wirebug Gauge recovery speed: Medium. Wirebug Cost: 1.
Guard Tackle: Switchable with Tackle. This is a forward-dashing attack using your flat side of the blade. It’s more cumbersome than the regular tackle, but allows you to guard while you’re doing the move.
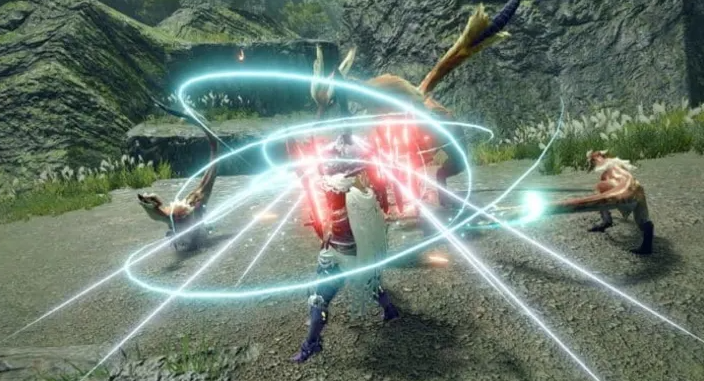
Silkbind Sakura Slash: Can be switched from Soaring Kick. You perform a whirlwind-like attack, dashing past the target with a Wirebug. Fast moves are always welcome for Hunters using big weapons, so this is a decent alternative.
Your Spirit Gauge increases by 1. Wirebug Gauge Recovery Speed: Slow. Wirebug cost: 1.
Drawn Double Slash: A drawn attack that unleashes two attacks in a row. While moving forward, you can absorb attacks. This move can be comboed to go straight to Spirit Blade II.
Drill Slash Combo: Can be switched from Hard Basher Combo. A derivative of the Shield Slam that converts Thrust to a Drill Slash. It’s a multi-hit attack with great potential when combined with an elemental weapon.
Sliding Slash: Can be switched from Advancing Slash. A sliding attack that slashes the target twice. This move has high reach but no ability to turn. Allows for follow up jumping attack.
Demon Flight: Can be switched from Demon Flurry Rush. An attack performed by slamming down both blades. A successful hit vaults you into the air, slicing your target as you spin upwards. Effective against monsters with weak points from high above.
Feral Beast Mode: Can be switched from Demon Mode. This is a more offensive version of Demon Mode, where you switch to an attack-focused stance, dealing slashing attacks when dodging.
Tower Vault: Can be switched from Piercing Bind. This move launches a Wirebug upwards and pulls you into the air. It does not deal any damage, but allows you to execute aerial combos with the Dual Blades.
Wirebug Gauge Recovery Speed: Fast. Wirebug Cost: 1.
Shield Charge: Can be switched from Dash Attack. A charging attack with the shield up. Can only dash for a limited amount of time while fending off attacks with the shield. Crashing into a monster deals shield-based blunt damage.
Insta-Block: Can be switched from Guard. It’s a parry: time your guard just before a monster hits you to follow-up with a Cross Slash. Great for countering right after blocking.
Ground Splitter: Can be switched from Hail Cutter. Scrapes the ground while slashing upwards. Increases shell, Wyrmstake Shot, and Wyvern Fire damage temporarily.
Wirebug Gauge Recovery Speed: Slow. Wirebug Cost: 1.
Blast Dash: Can be switched from Charged Shelling. Gives you a forward movement when attacking. Aims the Gunlance backwards then launches forward to close in the target. You can use Blast Dash again while hurtling if you time it right.
Water Strike: Can be switched from Side Smash. Attack that allows you to absorb an enemy attack. Perform before getting hit to negate the damage. Can be followed-up by an upswing hammer attack.
Charge Switch -Courage: Can be switched from Charge Switch – Strength. This move decreases charging levels, and allows you to follow from one charge into another quicker than usual.
Dash Breaker: Can be switched from Silkbind Spinning Bludgeon. A forward rush move using Wirebugs. Enemy attack damage is negated while launching forward!
Wirebug Gauge Recovery Speed: Fast. Wirebug Cost: 1.

Melody Mode – Echo: Can be switched from Melody Mode – Performance. An action that affects invigorating melodies. Generates a melody effect from the Staff using zR, while boosting your own abilities. A mode focused on applying various melody effects.
Bead of Resonance: Can be switched from Earthshaker. Places a Wirebug cocoon on the ground. If the same hunter generates melody effects, the effect also appears around the cocoon, as does a Sonic Wave that damages monsters near it. You can only place one cocoon at a time.
Wirebug Gauge Recovery Speed: Medium. Wirebug Cost: 2.
Forward Overhead Slash: Can be switched from Forward Slash. A lunging attack where you wind up the axe and smash it down. Difficult to pull off but delivers good damage. A subsequent Sword Mode attack will turn into a Double Slash.
Soaring Wyvern Blade: Can be switched from Invincible Gambit. This move launches you in the air while ending with a Forward Slash in midair. If Forward Slash connects, an explosion occurs.
Wirebug Recovery Speed: Medium. Wirebug Cost: 1
Condensed Spinning Slash: Can be switched from Condensed Element Slash. Activates the Element Regeneration system while charging. The shield rotates and acts as a spinning saw blade. Switches the weapon to Axe mode and turns energy into phials.
Counter Morph Slash: Can be switched from Morph Slash. This is a more defense-focused switching attack with a longer blocking effect. If successful, the follow-up Element Discharge Slash’s damage increases. Ideal for more defensive players who want the power of a Charge Blade.
Advancing Roundslash: Can be switched from Leaping Slash. You spin like a top and lunge forward. You can use the force of the spin to jump up; only works if you have momentum while spinning.
Tetraseal Slash: Can be switched from Tornado Slash. Delivers four strikes on the spot. One of the attacks is hit with the handle’s seal, which can lure in Powder Kinsects. With Red Extract loaded, perform a Leaping Slash and press A.
Quickstep Evade: Can be switched from Forward Dodge. Quick evasive maneuver when your Light Bowgun is drawn. The distance covered is shorter, but requires less time to recover. Ammo fired immediately after this deals increased damage.
Fanning Maneuver: Can be switched from Fanning Vault. Uses the Wirebug to quickly flank either left or right. Your attack power is increased temporarily.
Wirebug Gauge Recovery Speed: Fast. Wirebug Cost: 1
Tackle: Can be switched from Melee Attack. A shoulder check move. Â Prevents flinching and knockback, but still allow significant damage. Only use this for weak attacks that may knock you back!
Healing Mech-Wyvernsnipe: Can be switched from Mech-Wyvernsnipe. Fires a specialized shot, different depending on the weapon. Has its own gauge, and replenishes over time. Regular Wyvernheart and Wyvernsnipe deals less damage but can heal the hunter.
Dodgebolt: Can be switched from Charging Sidestep. A spinning evade move that doubles as an attack. Making it a near-miss can fill up the charge level considerably. Allows you to move forward, backwards, left, or right.
Aerial Aim: Can be switched from Focus Shot. An action for firing arrows by jumping straight up with a Wirebug. Particularly damaging shots can be fired from midair. A close-range attack using an arrow can also be aimed directly underneath you.
Wirebug Gauge Recovery Speed: Medium. Wirebug Cost: 1.

By Alleef Ashaari|August 4, 2023
SEGA has unveiled a new trailer for Persona 5 Tactica, which reveals two new characters who will be part of the game's DLC. Goro Akechi and Kasumi ...

By Alleef Ashaari|July 7, 2022
Have you really experienced your teenage years to the fullest if you haven’t lived through any of the scenarios below? Perhaps you were a major geek...

By Alleef Ashaari|October 20, 2023
The third episode of Loki Season 2 is now streaming on Disney+ Hotstar Malaysia. I’ll be discussing heavy spoilers so if you haven’t seen it or wa...

By Team KKP|May 10, 2024

By Mr Toffee|February 2, 2024

By Team KKP|July 1, 2023

By Alleef Ashaari|August 2, 2021

By Alleef Ashaari|February 9, 2022

By Team KKP|May 10, 2024

By Mr Toffee|February 2, 2024

By Team KKP|May 10, 2024

By Mr Toffee|February 2, 2024

By Team KKP|July 1, 2023
Copyright @ Kakuchopurei 2024